About Helen Frankenthaler

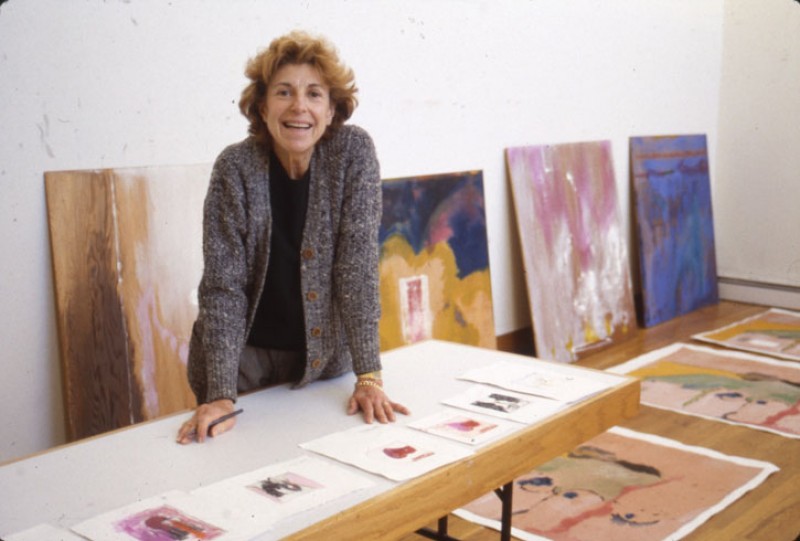
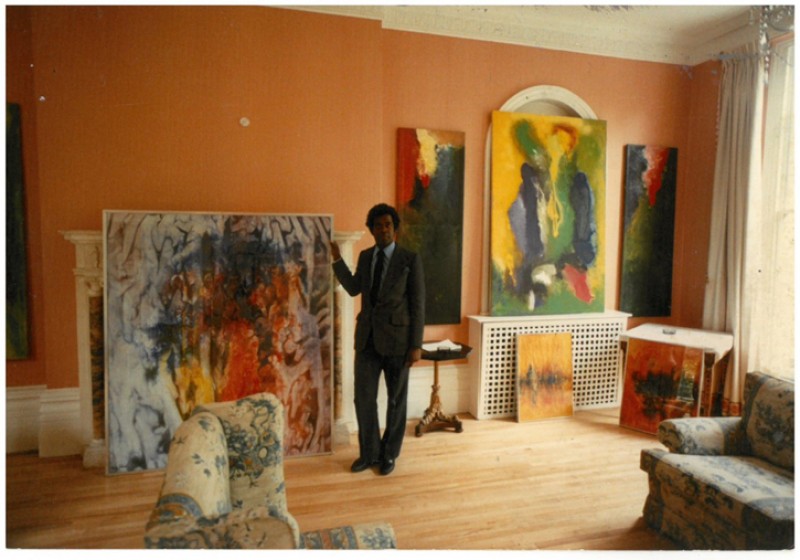
Helen Frankenthaler (1928–2011) was born into a wealthy New York family who supported and nurtured her abilities and interest in art. She studied at art schools in New York and Vermont.

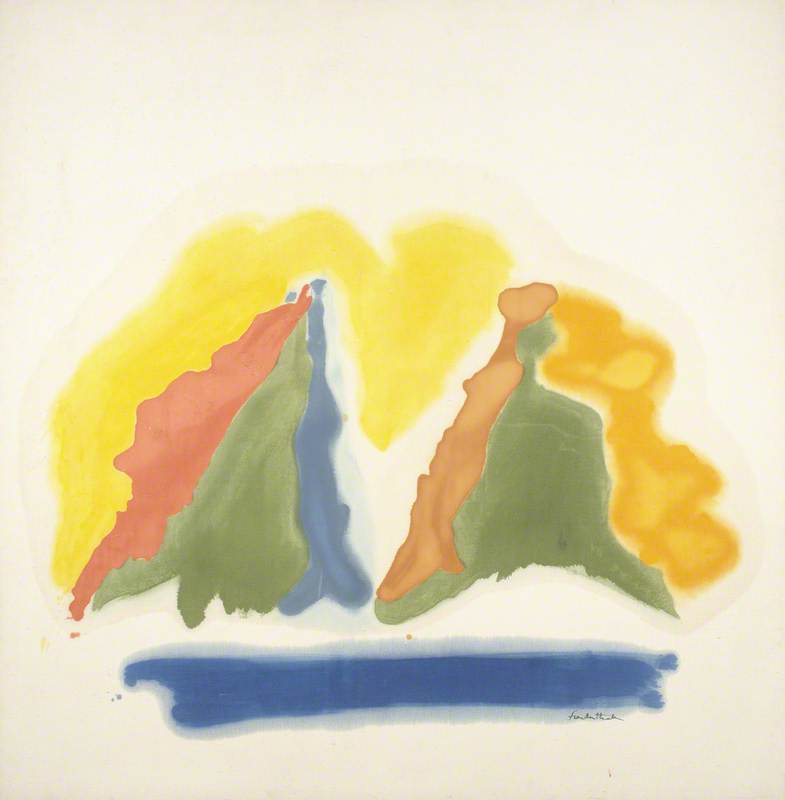
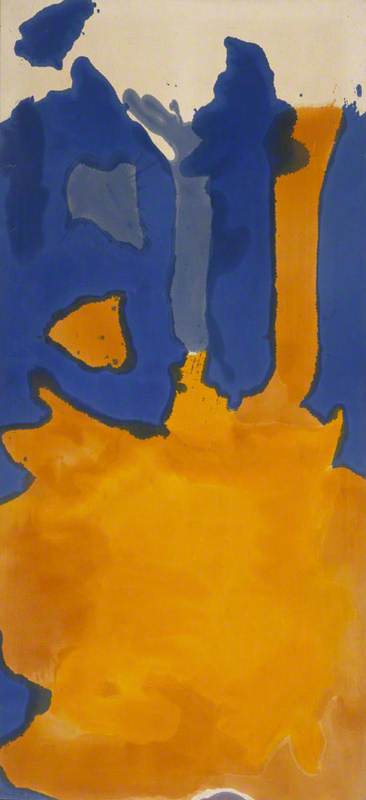
Two years after graduating from art school in 1948, Frankenthaler met the influential art critic Clement Greenberg in New York. He introduced her to several leading New York artists including Lee Krasner, Jackson Pollock, and Willem de Kooning who all painted in a gestural abstract style which had been labelled 'Abstract Expressionism'. She was inspired by their ideas and approach to painting but developed her own distinct style of pouring paint and allowing it to sink into and stain the canvas.

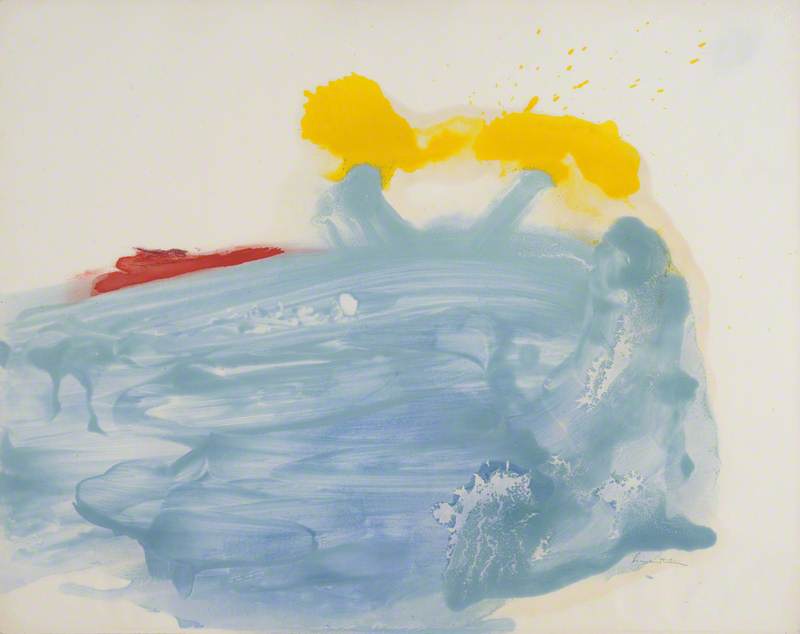
Landscapes and natural environments inspired Frakenthaler, but she didn't paint what they looked like, she painted how they made her feel. Her abstractions vary from airy, stained, pastel washes, to bold, gestural paintings with intense and contrasting primary colours. Her paintings celebrate the joys of pure colour.

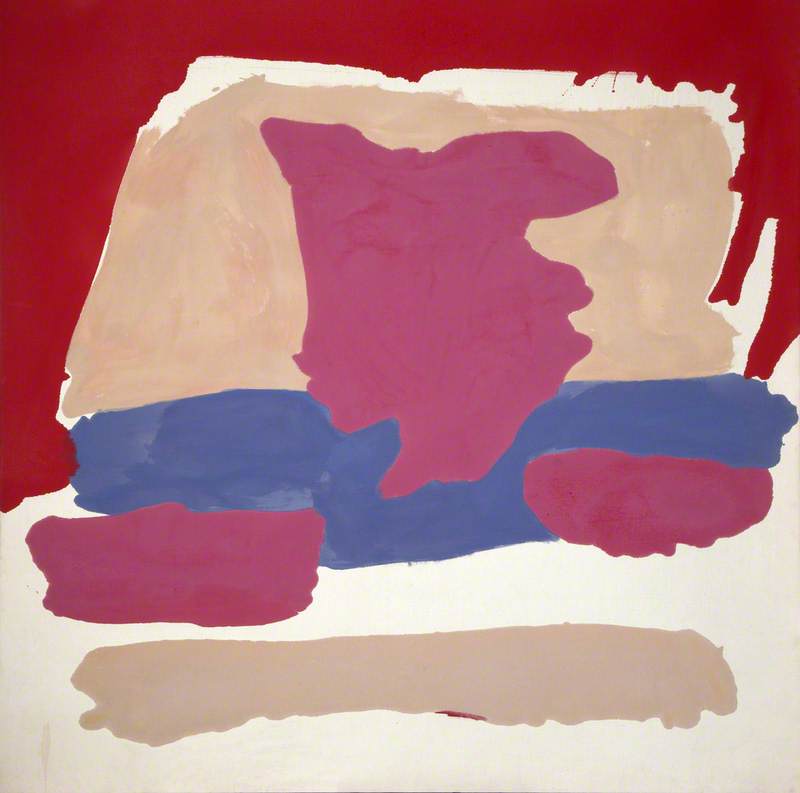
Sun Dial

Sun Dial

Helen Frankenthaler (1928–2011)

Lakeland Arts

Influence and legacy

Paintings by women are often overlooked in discussions about Abstract Expressionism. But Frankenthaler, along with Lee Krasner and Joan Mitchell were major players in the movement and contributed to the development of its style.

Frankenthaler's work was also a key influence on the development of the subsequent Colour Field Painting movement. Morris Louis and Kenneth Noland visited her studio in the 1950s and went on to develop their coloured canvases inspired by her pouring and staining technique.
What is Abstract Expressionism?

Abstract Expressionism is a painting movement that developed in and around New York in the late 1940s and early 1950s and continued until around 1965. Abstract Expressionist artists weren't interested in representing landscapes, objects or people as they exist in the real world but focused on medium and technique.

The artists associated with the movement didn't form an official group, but were friends and shared an interest in exploring abstraction through paint, colour and gesture. The term 'Abstract Expressionism' was applied to them after it was used in a magazine article about their work.

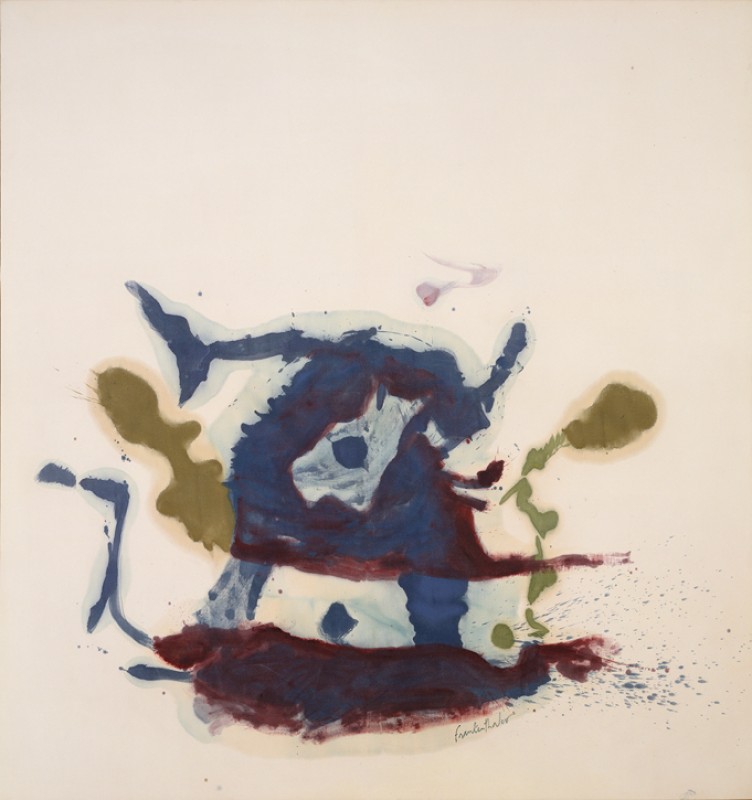
Blue Tide

Blue Tide 1963

Helen Frankenthaler (1928–2011)

Kettle's Yard, University of Cambridge

Using paint to express who they were

As well as exploring painting techniques, the Abstract Expressionists used paint to express who they were – their emotions, their ideas, and their physicality. They wanted their paintings to be a two-way encounter between artist and viewer, rather than something to be admired from a distance. The art critic Harold Rosenberg, who championed the Abstract Expressionists described their canvases as an 'arena' in which the artists acted, and suggested what went on the canvas was 'not a picture, but an event'.

A reflection of the times

The development of Abstract Expressionism is often seen as a response to the traumatic history of the early twentieth century – two World Wars, the Great Depression, the atomic bomb and the subsequent Cold War. Early Abstract Expressionist paintings reflected the darkness of the times.

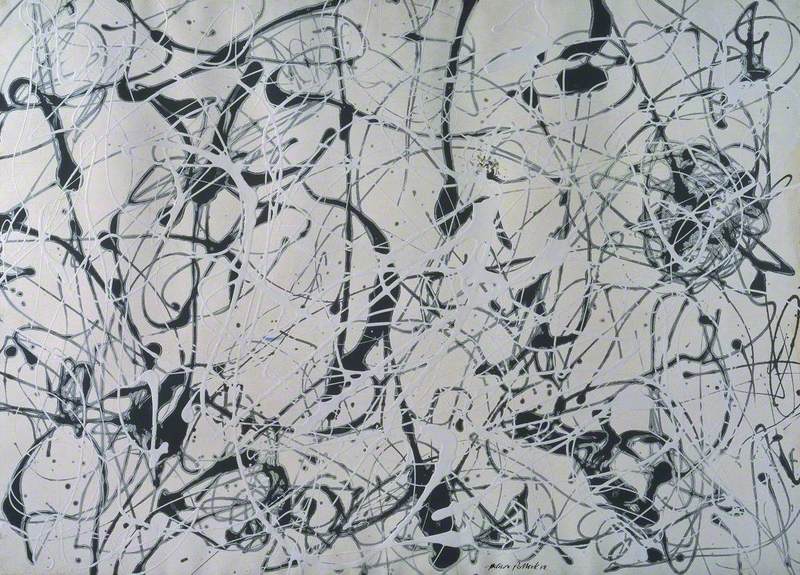
Number 14

Number 14 1951

Jackson Pollock (1912–1956)

Tate

The impact of these events also fed into the artists' desire to turn away from the old world and previous painting styles and explore new approaches that focused on experimentation and freedom of expression.

What does Abstract Expressionism look like?

'There are no rules. That is how art is born, how breakthroughs happen. Go against the rules or ignore the rules. That is what invention is about.' – Helen Frankenthaler

There is no single Abstract Expressionist style. Although the artists shared an interest in exploring abstract painting their individual approaches to using paint and materials led to very different results.

Discussion activity: styles and techniques

Compare the three Abstract Expressionist paintings below as a class and discuss their similarities and differences. (Click on the images to visit the artwork pages.)

  • Encourage students to look at the formal elements – the composition, colour and mark-making.
  • They could also discuss the mood or atmosphere of the paintings and their responses to them (what the paintings make them think and feel).

Now discuss as a class the techniques the artists might have used to create these paintings. Use the prompts below if helpful.

  • Did the artists use the paint thinly or thickly?
  • How do you think they applied the paint? What tools do you think they used?
  • Imagine you are watching the artists painting these pictures – what was their posture (how do you think they stood or sat)? How did they move their arms and hands – and feet? (Have a go at acting out what their gestures might have been as they worked on their paintings!)

Comparison thoughts: similarities and differences

  • The paintings are similar in that they are all abstract and have been made using gestural mark-making.
  • They are all on a large scale.
  • The composition in all the paintings might be described as an 'all-over composition'. There are no dominant focal points, and our eyes move across the canvas.
  • Both Kline and Pollock have used black and white paint, but Frankenthaler has used bright colours.
  • Kline and Pollock used ordinary household gloss paint, as this sat on the surface of the canvas and achieved the distinct marks they wanted. Frankenthaler used diluted oil paint that sank into the canvas.
  • The marks the artists have used are very different.
  • The impact and mood of each painting is also very different. There is an energetic elegance to the repeated marks in Pollock's painting. Kline's thick, black, broad brushstrokes seem urgent and fierce. Frankensthaler's painting has more of a contemplative atmosphere.

Abstract Expressionist techniques

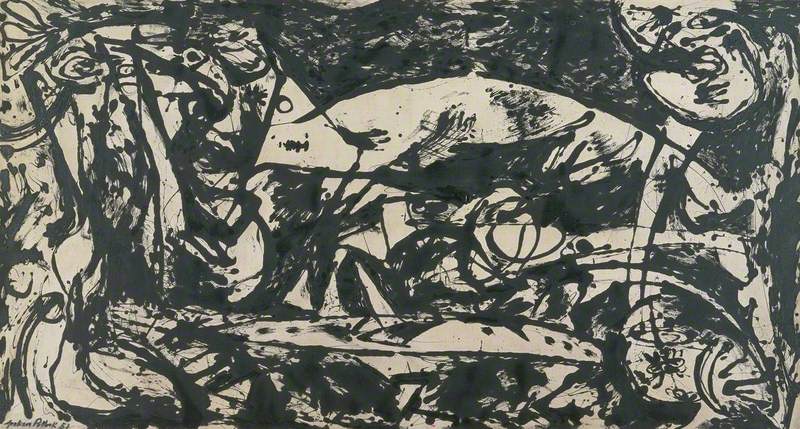
Jackson Pollock dripped and splashed paint from a brush or stick onto canvases laid on the floor.

He manipulated the paint using 'sticks, trowels or knives' (to use his own words), and sometimes added 'sand, broken glass or other foreign matter' to add texture to the paint. As he worked, Pollock moved around (and sometimes through) his paintings creating a sense of energy in the work. This also resulted in the 'all-over compositions' of his work. His approach of moving around his canvas as he worked led to the term 'action painting' an alternative name for this type of Abstract Expressionism.

  • Watch this MOMA video as a class and discuss Pollock's approach. 

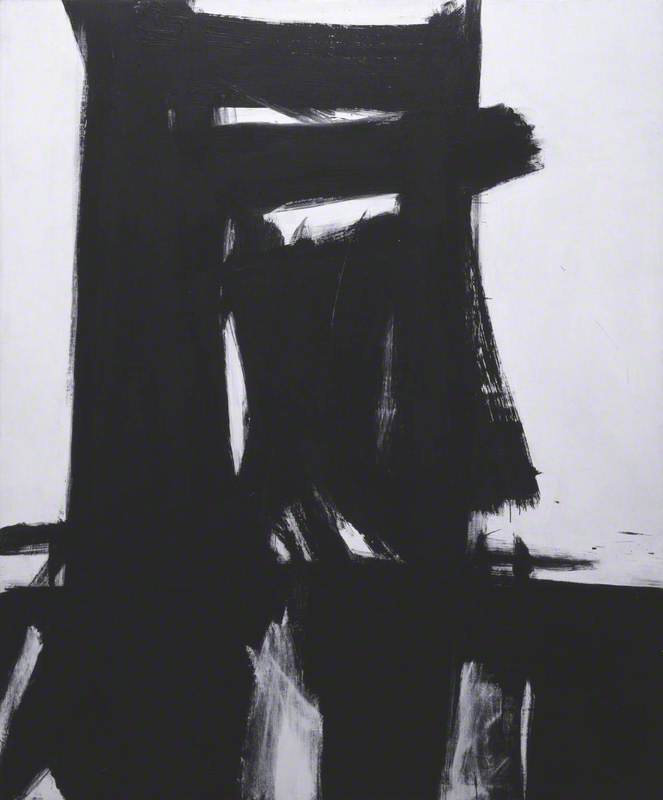
Franz Kline used broad gestural marks that tear across the canvas. His paintings look a little like East Asian calligraphy.

He developed his approach to painting by enlarging sketches of objects and cityscapes using a projector. He felt that the blown-up details of the lines and marks in his sketches looked more powerful and interesting than the original drawings.

Kline painted his canvases using household paint and decorators' brushes to create broad brushstrokes. (Some of his brushes were 20 centimetres wide!)

Meryon

Meryon 1960–1

Franz Kline (1910–1962)

Tate

Helen Frankenthaler poured paint so that it soaked in and stained the canvas which she laid on the floor. She was inspired by Pollock's pouring and dripping technique but developed her own approach and style. She added lots of turpentine to her oil paint to make it thin enough to pour. (She switched to using acrylic paint in the 1960s, diluting it with water.)

Frankenthaler used various tools to move the paint around on the canvas – including brushes, sponges and even car windscreen wipers!

  • Watch her at work in this short video.

Key Abstract Expressionist artists

Explore key Abstract Expressionist artists on Art UK:

Adolf Gottlieb

William de Kooning

Franz Kline

Lee Krasner

Joan Mitchell

Jackson Pollock

Mark Rothko

Art activities: experiment with tools and techniques

A key feature of Abstract Expressionism is the artists' experimental approach to painting. The activities below provide some ideas for experimenting with mark-making. Encourage students to enjoy exploring processes rather than be overly concerned with finished artworks.

Pouring, dripping and flicking paint

Students will work on the floor for this activity and it could get messy! Prepare the classroom by clearing space in the centre of the room and covering the floor with sheets of newspaper or plastic sheeting. Ask students to bring in old shirts or coveralls to protect their clothing.

Students will need:

  • a large sheet of heavy-weight paper (at least A1 size), canvas or fabric (old curtains or bedding from a charity shop could be used for this)
  • jars or paper cups of water-based paint (a range of colours) diluted sufficiently so that it can be poured and dripped
  • sticks or brushes (for dripping the paint)
  • sponges (for moving paint around)

Be inspired

Frankenthaler was inspired by the way landscapes made her feel. Pollock was inspired by the rhythms of jazz music.

Ask students to think of something that inspires them. This could be a beautiful landscape or buzzing cityscape they have visited; an experience (such as playing a sport, or spending time with friends); or a piece of music. What is the mood of these places or experiences? How do they make them feel? It might help them to think of words to describe their feelings. They could also think of colours that express their responses.

Sands

Sands 1964

Helen Frankenthaler (1928–2011)

National Museums NI

Method for the pouring technique

Re-watch the video included earlier in the resource showing Helen Frankenthaler's process.

  1. Students should choose 2 or 3 paint colours that express the mood that they want to put across.
  2. Starting with one colour, they should gently pour a small amount of paint onto the paper or fabric. They could move around their paper/fabric to pour the paint across their surface. They could also move the poured paint around their surface to create shapes using a brush or sponge.
  3. They can then add another colour to another area of the paper/fabric and move the paint around to create a new shape. (It doesn't matter if the shapes overlap.)
  4. Ask them to stand up and look at their emerging painting. Is it taking shape? What do the shapes suggest? Do they capture the feeling they want to put across? What other colours and shapes could they add?
  5. Once they have their stained shapes, students could add gestural marks to help put across the mood they want to create by dripping or flicking the paint using a brush or adding brushstrokes. They could also add marks using crayons, pastels or charcoal. (They may need to wait for their poured paint to dry first.)

Method for the dripping technique

Re-watch the video included earlier in the resource showing Jackson Pollock's process.

  1. Students should choose 2 or 3 paint colours.
  2. Using a stick or brush, they should drip the paint across the surface of their paper/fabric. Drawing in the air with their brush or stick will produce patterns or shapes on their canvas. They should think about the mood they want their artwork to have and create straight sharp lines of drips or curved, organic ones.
  3. The dripped marks and lines that Pollock created in his paintings weren't random. He repeated the marks he made across the surface to create a sense of rhythm. Ask students to think about the dripped marks they make and the impact they want their paintings to have on the viewer.
  4. Encourage students to be aware of their hand and arm actions – the rotations of their shoulder, elbow and wrist, and also their feet as they move around the painting. Pollock looks almost like a dancer when he paints.

Number 23

Number 23 1948

Jackson Pollock (1912–1956)

Tate

Experimenting with non-traditional painting tools

Abstract Expressionist painters didn't always use brushes. Sticks, sponges, turkey basters and windscreen wipers were all adopted as tools by the artists.

For this activity, students will explore using unusual tools to make gestural marks.

Gather a range of objects that students could use for making interesting marks with paint such as sticks, rags, sponges, squeegees, feathers, leaves, pebbles, rollers (or other objects that could be rolled such as bottles, cardboard tubes), etc.

Encourage students to experiment with using these objects in different ways to make marks.

  • Divide the objects into two groups: objects that might be used to create broad sweeping marks – e.g. rollers, squeegees, sponges etc; and objects that might be used to create sharper, more delicate, lines and marks – such as sticks and feathers. Ask students to select an object from each group as their mark-making tool. What is the effect of combining the different marks?
  • Challenge students to try and make 3 different types of marks with the same object – e.g. by rolling, dabbing and pulling the object across the page.
  • Task students with holding a different object in each hand and using them simultaneously to make marks.
  • Play a range of music in the classroom and ask students to choose and use tools to make marks in response to the music.

Collage as mark-making

This activity is inspired by Lee Krasner who cut up and re-used old paintings alongside collage materials to create expressive, textured collage paintings.

Students will need:

  • a large sheet of thick coloured paper
  • collage scraps (including, ideally, old 'failed' drawings or paintings that students don't mind cutting up!)
  • glue
  • scissors

Lee Krasner's collage paintings

In the early 1950s, artist Lee Krasner experimented with collage. She cut and tore up 'failed' paintings to create textured surfaces of contrasting colours and shapes.

If you look at the collage painting below, you will see that she has used scraps of a cut-up drip painting alongside other painted scraps, and has combined these with torn scraps of plain, coloured papers. She cut and tore the scraps in different ways so that she had a range of frayed, jagged, and sharp-edged pieces to work with. This painting is called Bald Eagle, and you may notice that some of the shapes in the painting look like flying birds.

Method

  1. Students should start by cutting and ripping a range of shapes from their 'failed artworks' (if they have any) and collage materials. (They could use some of their mark-making experiments from other activities suggested in this resource and cut or tear these up, as materials for this activity.)
  2. Like Krasner, students may choose to cut out some of the shapes so that they suggest things from the real world – such as birds, animals or plants. Or they could keep the shapes completely abstract.
  3. They should then arrange and glue the shapes onto their coloured paper background, layering them and mixing different colours and textures.
  4. Students could work back into the collage with gestural paint marks, splashes or drips to add another layer of mark-making.

Enlarging details

This activity is inspired by Franz Kline, who developed his abstract technique of using broad, expressive lines and planes by projecting smaller sketches of objects and townscapes.

Meryon

Meryon 1960–1

Franz Kline (1910–1962)

Tate

Students will need:

  • soft pencil, crayon or charcoal
  • a small sheet of paper (A4 or A5)
  • a large sheet of paper (ideally A1 or A2)
  • black paint
  • wide decorating brushes
  • a digital, opaque or overhead projector

Method

  1. Task students with making a quick (3-minute) sketch of an object in the classroom using a soft pencil, crayon or charcoal. This could be a chair or table, a corner of the classroom or a view of buildings from the window. It doesn't need to be neat or 'finished' – a rough sketch with messy lines is fine! (If you are using an overhead projector for this activity, students should sketch onto a sheet of acetate using a pen for drawing on plastic film.)
  2. Set up the projector and prepare the images. If you are using a digital projector, photograph the students' sketches so they have an image file of it to project (or project the image from a phone if the projector allows for this). If you are using an opaque or overhead projector, you can project the drawing directly from the paper or acetate.
  3. Project the students' drawings directly onto large sheets of paper. Students should select a detail that they find interesting. (Move the drawing around to see different details.) Enlarge the detail so that it fills the paper. Students should paint the enlarged sketch details using a broad decorator's brush and quick, gestural brushstrokes.

Do you know someone who would love this resource?
Tell them about it...

More Art UK resources

See all