William Lamb's sculptures

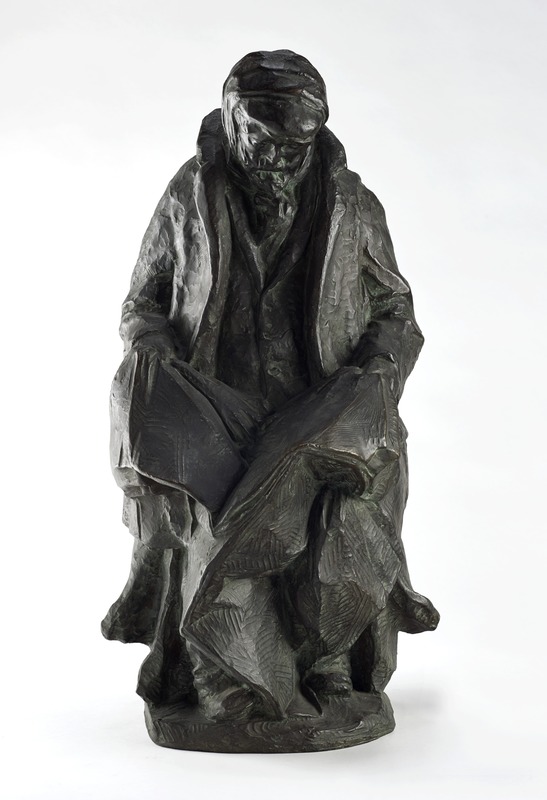
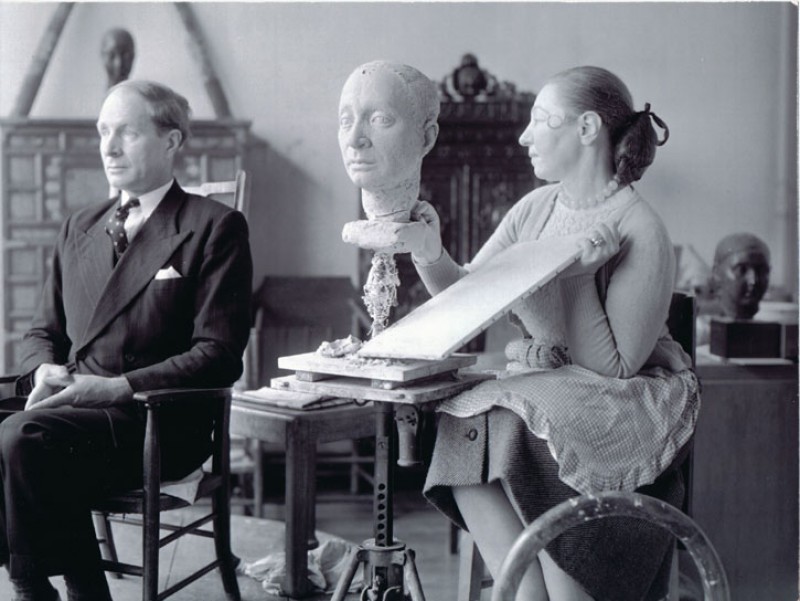
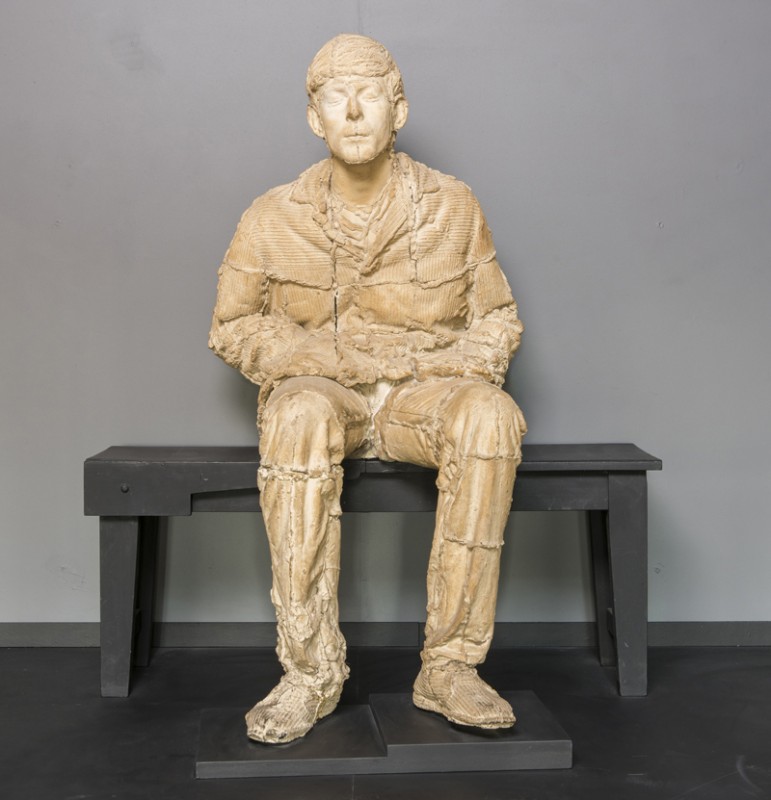
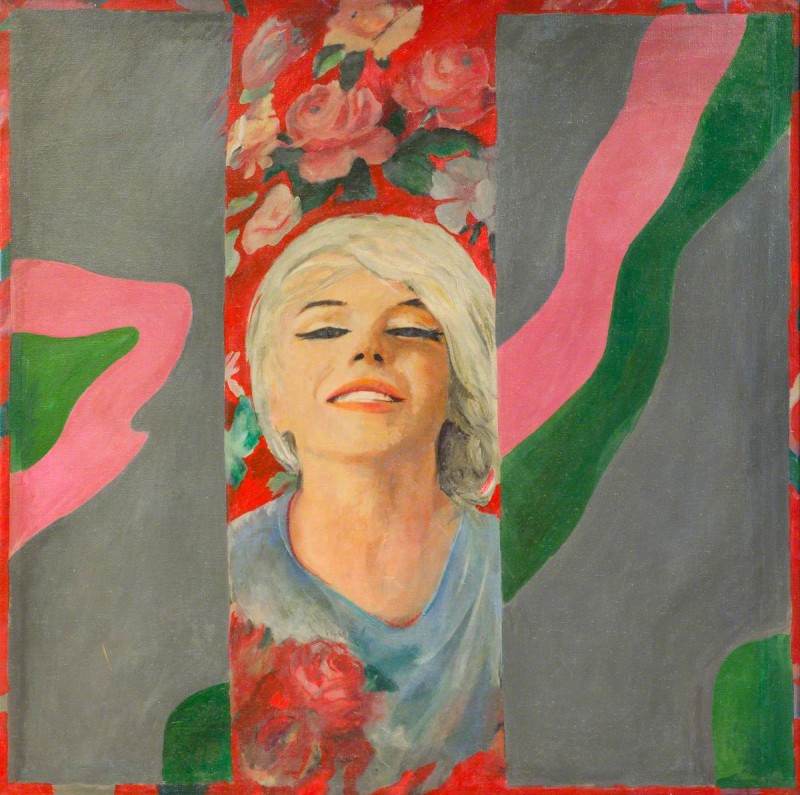
From the 1920s until his death, William Lamb produced many sculptures, often of the local people he saw around his hometown of Montrose.

Bill the Smith

Bill the Smith 1937

William Lamb (1893–1951)

High Street, Montrose, Angus

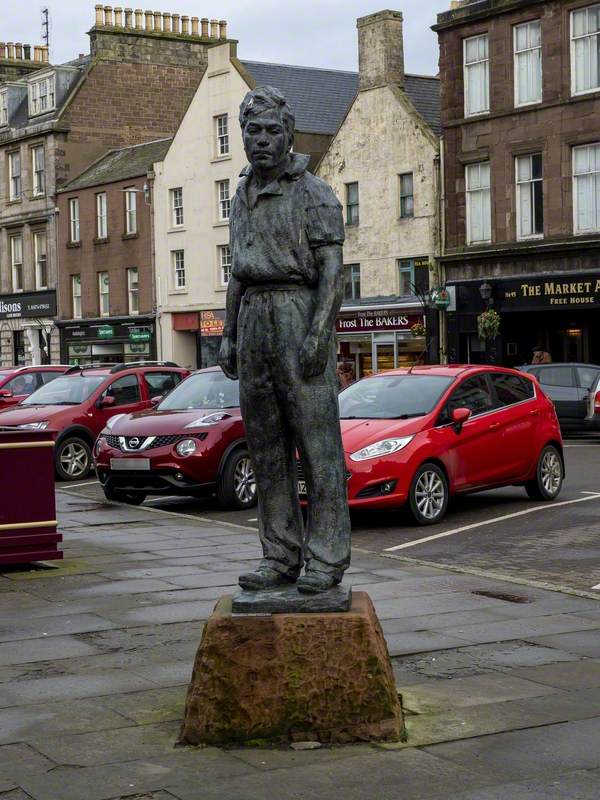
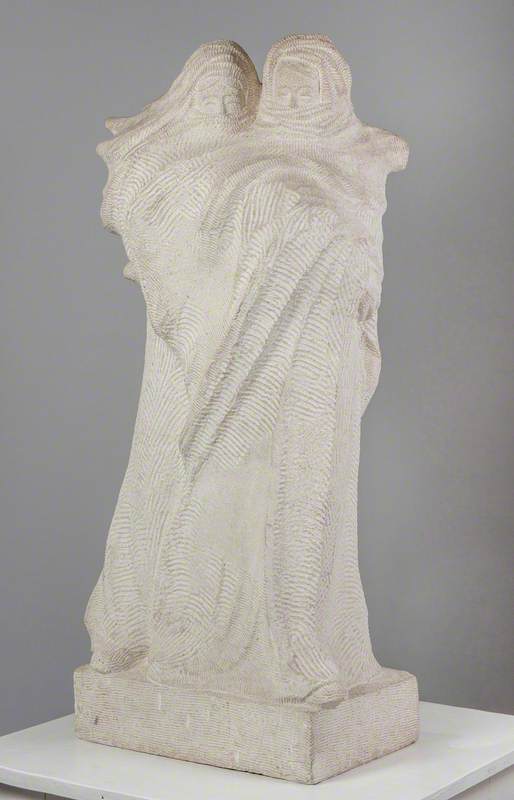
Although best known for his powerful, expressive depictions of the local fisherfolk of Montrose, Lamb also made sculptures of artists and literary friends.

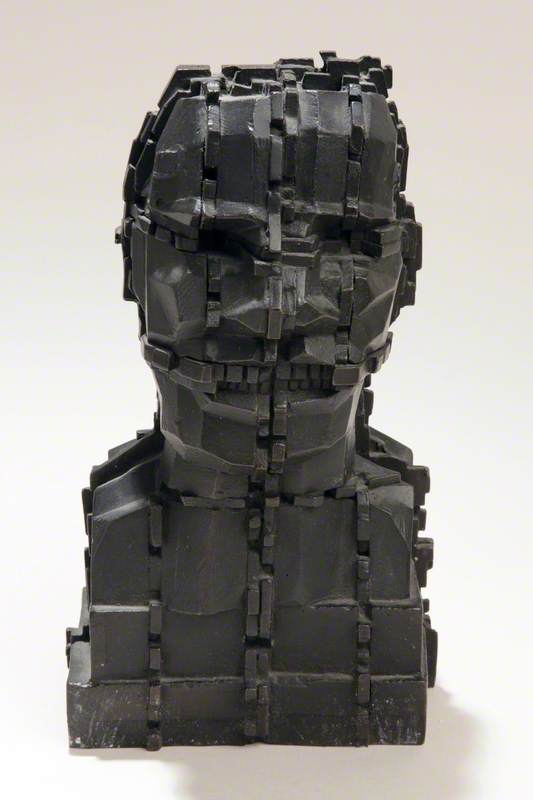
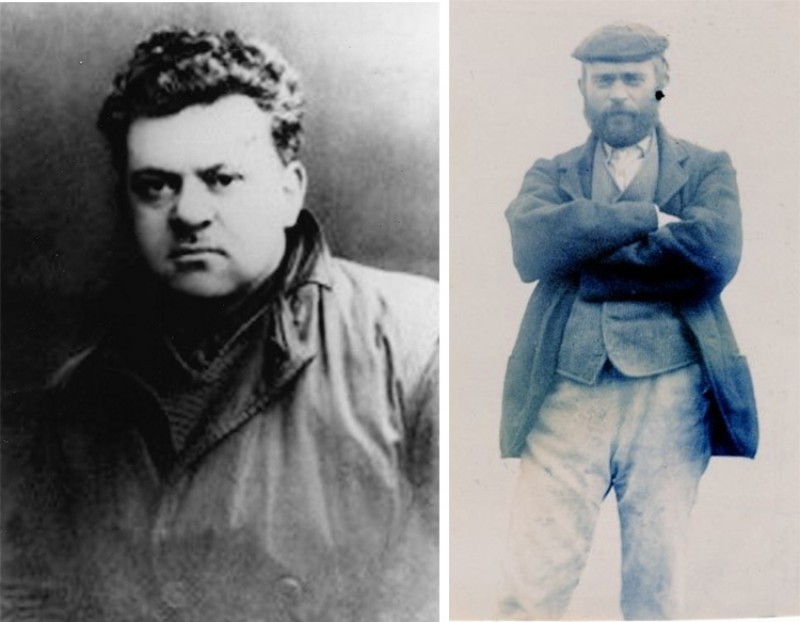
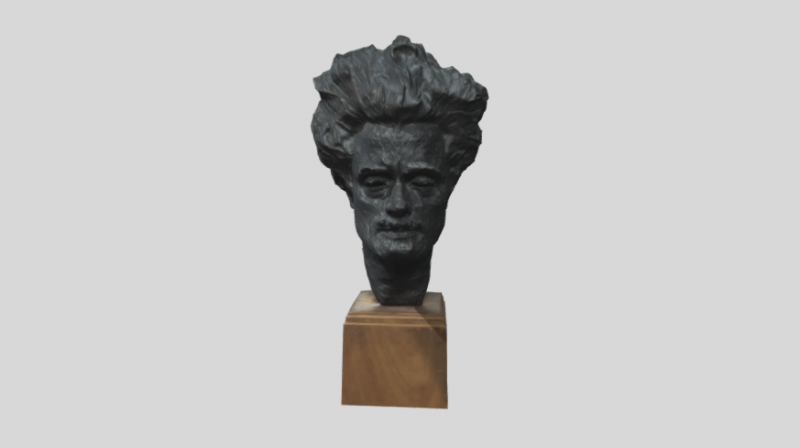
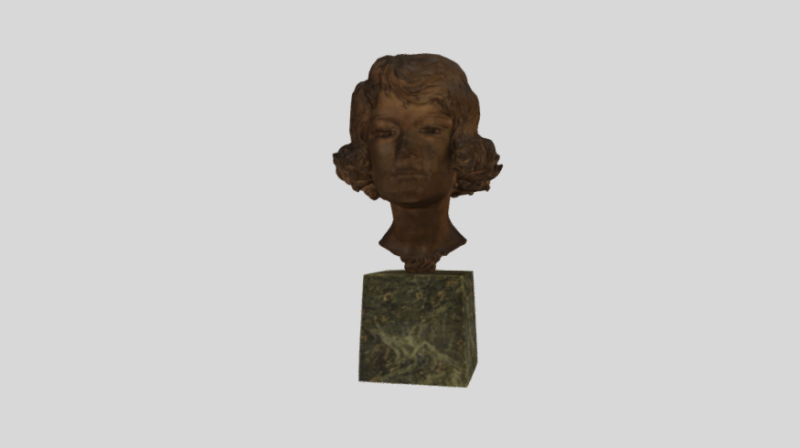
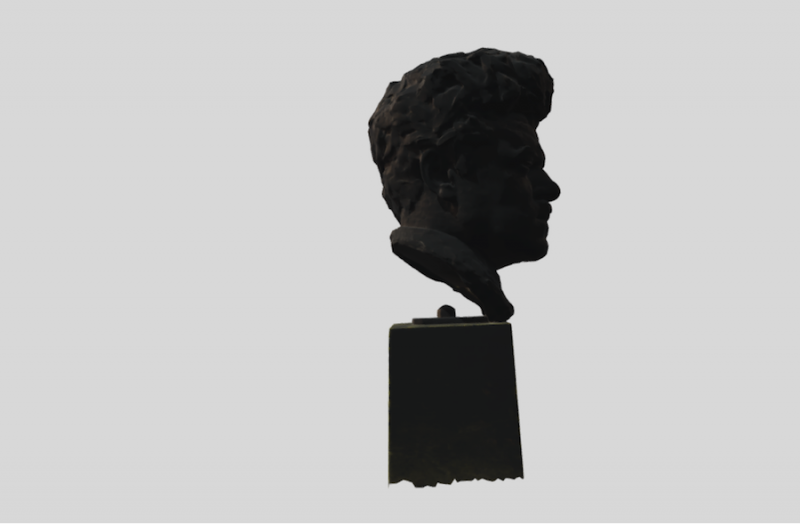
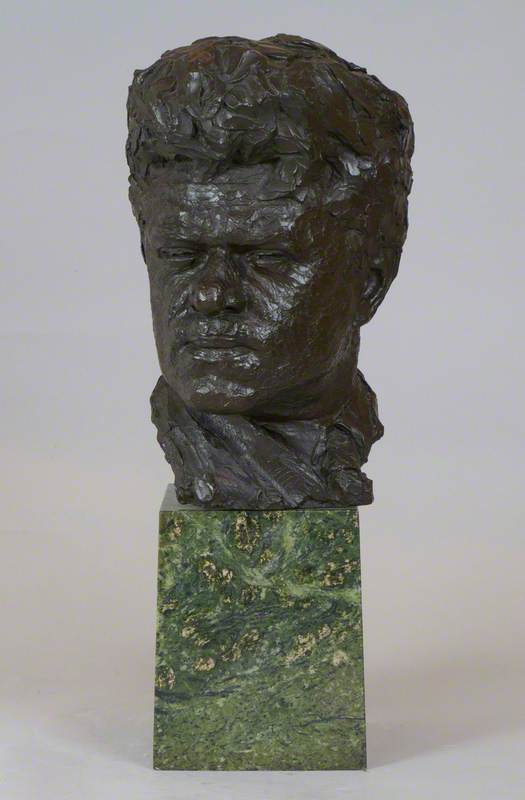
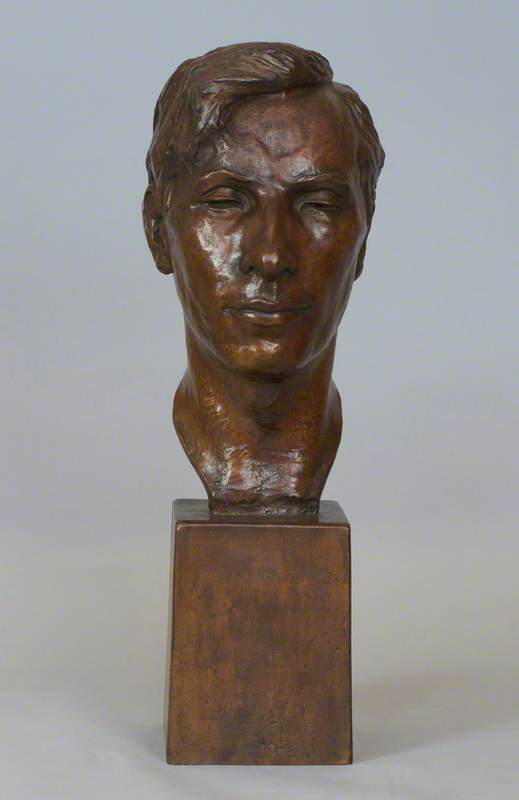
Here are two more sculptures by William Lamb. The sculptures are portraits of artist Edward Baird and poet and journalist Hugh McDiarmid. (This type of sculpture, which shows just the head and sometimes the shoulders of a person, is called a bust.)

Edward Baird (1904–1949)

Edward Baird (1904–1949) 1932

William Lamb (1893–1951) (posthumous cast)

ANGUSalive

Hugh MacDiarmid (1892–1978)

Hugh MacDiarmid (1892–1978) 1927

William Lamb (1893–1951)

ANGUSalive

Discuss the sculptures as a class

  • What are your first impressions of each sculpture? (It might help to ask students to think of words to describe each sculpture.)
  • Do you feel you know something about what these people are like from looking at the sculptures?
  • Is the style of the sculptures similar – or very different?
  • What do you think the sculptures are made from?

Sculpture thoughts

The sculptures are both portraits, but they look very different.

  • The first is a portrait of a Scottish painter called Edward Baird. He, like Lamb, was from Montrose. We can see that his hair is short and neatly parted, he has a slight frown and seems calm and serious. The portrait looks more conventional. The surface of the sculpture is smoother.
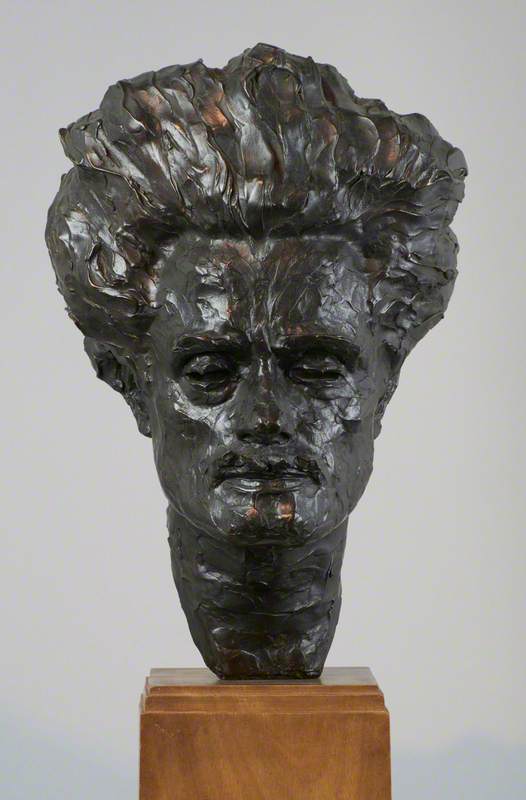
  • The second sculpture is a portrait of Scottish poet Hugh McDiarmid. It is less conventional and more expressively sculpted with a heavily textured surface. The expressive marks and textures suggest the passionate and flamboyant character of McDiarmid.

Although very different in colour, both sculptures are made from bronze. Bronze is naturally a golden brown colour (as seen in the sculpture of Baird). Its colour can change over time and oxidises when exposed to air. But it is also sometimes treated with chemicals such as potash to darken it and make it look black.


William Lamb's techniques

By looking more closely at his sculptures using the 3D models we can find out more about William Lamb's technique.

Modelling and casting

Lamb's bronze sculptures would have first been sculpted in clay, soft wax or plaster and then cast in bronze from the clay or plaster model.

Look closely again at the portrait of Hugh McDiarmid using the 3D model to see the surface details.

  • If you look at the right-hand side of the face and the neck, the skin looks as if it has been made from small lumps of clay or soft plaster.
  • On a section of the cheek, there seems to be some kind of rough fabric under the surface.

Sculptors often smooth the surface of their sculptures. But Lamb left the shapes of the lumps of clay or plaster that he used to build up his portrait visible. He also left the expressive marks made by his fingers and tools.

The woven texture on the cheek suggests that he used cloth or scrim on top of the armature before adding the clay or plaster.

Stone carving

Not all of William Lamb's sculptures were portraits. He also created sculptures that are allegorical and suggest the influence of Symbolism.

The Whisper

The Whisper (unfinished) 1951

William Lamb (1893–1951)

ANGUSalive

The Whisper shows two embracing figures wrapped in cloaks, their faces half-covered. Rather than being depictions of real people, Lamb has created the sculpture to symbolise or represent an idea. It suggests something mysterious or secretive. (Lamb didn't finish the sculpture so we don't know if he planned to add more detail.)

Look closer at The Whisper

 
Use the 3D model to explore the sculpture's forms and surface.
  • What do you think this sculpture is made from?
  • What does the surface of the sculpture look like?
  • What sort of marks can you see?
  • What tool do you think made these marks?

About the technique

The sculpture is carved from stone. The surface of the sculpture is marked with small lines or grooves. These grooves are made by a claw chisel. A claw chisel is a special type of chisel that has small teeth or prongs and is used by stone carvers to shape stone. The direction of the chisel marks makes us more aware of the curves of the sculpture and emphasises its undulating form.

Watch this video to see a stone carver at work, using chisels and a mallet.

Sculptors' techniques: Dawn Rowland

Activity suggestions: make a portrait head or figure inspired by William Lamb

Task your students with making either:

  • a portrait head from air drying clay (or clay if you have access to a kiln) using an armature
  • or a small figure sculpture from air drying clay or plasticine. (The figure option may be more suitable for younger students.)

Make a portrait head sculpture

Students should work in pairs so they can use each other as models. They could perhaps take it in turns to model for ten-minute stints – or sculpt each other at the same time!

This time-lapse video provides some step-by-step ideas for making a clay head using a basic wire armature:

See the Art UK Activity 'Model a Clay Head' for more detailed information and instructions

As students are working encourage them to:

  • Look at their model closely as they add the details.
  • Walk around their model so that they can see what their model's head looks like from all sides. (Look at the top of the head and crouch down to see underneath the chin!)
  • Explore the textures that their fingers and clay tools make. How can they suggest something about the character of their sitter using textures and marks?

Make a figure sculpture

William Lamb often made figure sculptures of people he knew or saw around his home town.

An Old Man Reading a Newspaper (The Daily News)

An Old Man Reading a Newspaper (The Daily News) 1930s

William Lamb (1893–1951) (posthumous cast)

National Galleries of Scotland

Task students with making a figure sculpture of someone they know or see day-to-day such as a teacher, a bus driver, a lollipop person or another student.

Students will need: pencil and paper (or sketchbook); modelling material or air drying clay; tools for working the clay.

  • They should start by thinking about who their sculpture is of: What do they look like? What clothes do they wear?
  • It might help to sketch some ideas and sketch what their subject looks like from all sides.
  • When they make their model they should start by making the basic shape of their figure, deciding what the pose will be. They can then add details – such as the clothes, the face and the hair.
  • As they work encourage them to think about how they can use their clay tools (and fingers!) to create the shapes and surface of their sculpture.
  • How can they express the character of the person as well as what they look like using marks and textures?

Find out more about 3D scanning and modelling

The 3D models in this resource were made using a process called 3D scanning.

As with digital photography or 2D picture scanning, this is a technology that collects data about a real-world object, such as its size and shape. But 3D scanning builds a digital 3D model from this information rather than a 2D image.

The 3D digital models can then be shared online through platforms such as Sketchfab, which you have been using in this resource. Sketchfab is a library of 3D models created by different people and organisations. Some of the models on Sketchfab have been made using 3D scanning techniques, others are sculpted from scratch using 3D modelling software such as Blender, Cinema 4D, or SketchUp.

There are now lots of different ways to create 3D scans but one of the most popular and more accessible methods is called photogrammetry.

About photogrammetry

Photogrammetry uses coordinates or points, also known as 'vertices', taken from across the surface of an object and measures the distance between these in order to accurately represent it in 3D model form.

These vertices are obtained from lots of photographs of the object taken from lots of different angles and are used to make thousands of small shapes or blocks which form the mesh-like wireframe of the model.

This image shows the wireframe view of the 3D model of William Lamb's portrait bust of Hugh McDiarmid, with tiny triangle blocks formed from the vertices.

The wireframe view of the 3D model of William Lamb's portrait of Hugh McDiarmid

The wireframe view of the 3D model of William Lamb's portrait of Hugh McDiarmid

Explore more 3D models of William Lamb's sculptures on Sketchfab

You can see the wireframes of the models by selecting 'model inspector' from the 3D model screen and then 'wireframe' from the drop-down menu.

Activities: digital technology and 3D models

3D scanning and modelling require time and expertise to master. But other digital tools can be used to create 3D models.

Here are some ideas for your students to try...

Build a simple 3D digital sculpture using Minecraft or virtual 3D pixel art

Task your students with building a digital version of their head or figure sculpture using Minecraft or 3D pixel art app usecubes.

wl-minecraft-intro-1.jpg

As we have seen, 3D scanning uses lots of small blocks (or triangles in the case of Hugh McDiarmid's digital portrait) to build a 3D model.

Building with small blocks is also the process used in Minecraft and usecubes to create 3D objects and environments.

Although students' 3D models won't be an exact version of their sculptures, using blocks to build their models will encourage them to understand the technology of virtual 3D modelling and to consider forms and objects from all angles.

Explore Minecraft and usecubes using the links below and decide which option might be most suitable for your students.

Minecraft

Minecraft is a video game that allows users to build virtual environments using blocks. It can be accessed on a computer, tablet or smartphone. (It's not free, but some of your students may already have it.)

This video tutorial provides some useful instructions for using Minecraft to create a sculpture.

10+ Minecraft statue designs (and how to make one)

Tip! If students are finding it tricky to make a head or a figure using Minecraft blocks, you could task them with making a 3D model of an abstract sculpture – such as Barbara Hepworth's Family of Man (1970).

This blog article provides some ideas

Minecraft version of Barbara Hepworth's 'Family of Man' (1970)

Minecraft version of Barbara Hepworth's 'Family of Man' (1970)

3D pixel art

usecubes is an easy-to-use browser-based app (so no download or install are needed).

By simply selecting cubes, then dragging, drawing and painting them users can build 3D pixel art on an iPhone, iPad, or computer.


Differentiation: advanced students

More advanced or technologically-savvy students may wish to have a go at creating 3D models using photographs of their clay portrait sculptures.

Meshroom is free open-source 3D reconstruction software that uses photogrammetry technology.

Use this video tutorial for tips on using Meshroom

Manual tutorial for beginners

Explore and interact with 3D models

You could also task more advanced students with exploring and experimenting with digital tools by editing existing 3D models of objects.

  • Download 3D models of sculpture from Scan the World, (a free open source community-built initiative whose mission is to share 3D printable sculpture).
  • Then use 3D software such as Blender to open and edit models: change how they look, re-think them or animate them!

Download 3D models of sculpture from Scan the World

Find out about and download Blender

Watch Blender tutorials


Differentiation: younger or less able students

Younger or less able students could create a 3D rotating animation of their head or figure sculpture using an online GIF maker.

Although creating a GIF won't provide the same insights into 3D modelling as the other activities, students will produce a short animation of their sculpture so that it can be seen from all angles.

To create a GIF animation of their sculpture in the round, students will need to photograph their sculpture from different angles (front, sides and back) and then upload their photographs to a GIF maker. (The GIF animation above was made from seven photographs of the sculpture.)

There are lots of free GIF makers available online: try EZGIF or Giphy.

Alternative / non-digital activity suggestion: modular sculptures

If you don't have access to digital equipment to build 3D virtual models, task your students with creating a modular sculpture using small units instead.

Filter

Filter 2002

Antony Gormley (b.1950)

Manchester Art Gallery

Sculptors David Mach and Antony Gormley often use lots of small objects to build up their sculptures. (They have used objects as unlikely as matchsticks, coat hangers and pieces of toast!)

  • Ask students if they can work out what this head by David Mach is made from!

Dad

Dad

David Mach (b.1956)

Fife Council

Modular sculpture activity

Task students with building a head or figure sculpture using small units such as paper straws cut into sections, small wooden cubes (available from craft suppliers), or small bricks or balls made from tin foil. (Or you could use – and recycle – everyday found objects such as plastic bottle tops.)

Explore more modular sculptures on Art UK:

Extension activity

Geodesic dome structures and sculptures

Explore geodesic domes and other structures. (This activity provides opportunities for cross-curricular learning with maths.)

Architect Buckminster Fuller famously developed a geodesic dome from triangular elements in the 1940s. The triangular elements distribute the structural stress throughout the structure, making geodesic domes able to withstand very heavy loads for their size.

This resource provides ideas for making models of geodesic domes with students.

PBS Activity: Geodesic Dome

You could also use geodesic model-building techniques to make abstract sculptures.


Do you know someone who would love this resource?
Tell them about it...

More Art UK resources

See all